

When homeowners undertake a massive property transformation, excitement often masks a complex reality. Redesigning a house is not merely about selecting tile patterns or picking wall colors. It requires a precise, logical sequence of operations. If the schedule is off by even a few days, the timeline collapses into chaos. Drywall might need to be torn open because electrical conduits were forgotten. Understanding the exact order in which to schedule each trade professional makes the difference between a smooth project and an expensive nightmare.
The secret to a seamless renovation lies within the master schedule. Every specialized trade relies directly on the foundation laid by the professional who preceded them. A framing crew needs a stable foundation. The drywall crew cannot begin until structural framing is square and hidden mechanical systems are verified. Painters require smooth drywall surfaces before opening a paint can. Managing a complex home remodeling undertaking requires mastering this continuous domino effect. Homeowners stepping into the project manager role must grasp the logic behind the construction progression. The core strategy is consistent: build from the exterior inward, construct from structural bones to surface details, and execute heavy rough work before applying delicate aesthetic finishes.
This guide outlines the timeline that veteran general contractors utilize to execute large property overhauls. Following this proven progression protects your financial investment, keeps trade specialists working efficiently, and guarantees that the finished project aligns with the original vision. Let us examine how to structure every phase of a major renovation from initial teardown to final cleanup.
Phase 1: Securing and Weatherproofing the Exterior Envelope
Before any worker swings a sledgehammer inside the house, the exterior envelope of the property must be sealed and secured. Water infiltration represents the single greatest threat to any construction project. If a home is not completely watertight, thousands of dollars worth of new building materials inside remain at risk of ruin. Consequently, the master sequencing plan always begins at the highest point of the structure.
The initial phone call must be placed to arrange a timely roof repair. Certified roofing professionals evaluate the structural integrity of the roof deck, strip away deteriorated shingles, replace damaged plywood, and lay down waterproof underlayment before securing new shingles. Addressing this top protective layer first creates a dry environment for all subsequent interior trades. It prevents rainstorms from destroying exposed framing or seeping down into lower levels.
As soon as the roof surface is fully sealed, attention shifts immediately to the perimeter water diversion system. Hiring experienced gutter installers represents the next logical step in protecting the home. These technicians measure, fabricate, and mount seamless gutter channels designed to divert rainwater away from the foundation. If this task is delayed, water cascading off the new roof will collect around the base of the structure, potentially leaking into basements or damaging footings. Establishing a weatherproof shell safeguards the property against water damage while interior preparations get underway. home remodeling
Phase 2: Expanding Outdoor Living and Framing Exterior Structures

With the main building protected against rain and moisture, the construction sequence expands outward to exterior living features. Many property owners wish to construct custom outdoor living spaces, such as covered patios or expansive entertainment areas. Scheduling this heavy outdoor work early in the overall sequence is strategic because it involves heavy equipment, excavation machinery, concrete deliveries, and large stacks of timber. Executing this phase early prevents heavy trucks from damaging new landscaping or driveways later.
Enlisting a skilled deck builder at this point isolates messy structural work to the exterior. These crews require space to dig footings, pour concrete piers, and assemble structural support posts. Constructing the outdoor framework early also establishes efficient site access. Subcontractors can utilize the sturdy exterior platform to reach upper-level access points or move materials in and out of the house without tracking mud through indoor living areas.
Furthermore, outdoor structural builds often involve distinct municipal building permits and required local inspections. Completing footing checks and framing inspections early prevents unexpected administrative delays from halting progress. While the outdoor crew works independently in the yard, interior demolition teams can begin tearing out old finishes inside. This parallel scheduling approach optimizes the overall project timeline and keeps momentum moving forward.
Phase 3: Interior Demolition and Structural Framing Adjustments
Once the exterior shell is secure and outdoor structures are underway, the project shifts into the interior demolition phase. Interior teardown is intense, dusty, and physically demanding. Demolition crews clear away obsolete cabinets, worn floor coverings, and damaged wall boards to expose the framework. This phase requires care to avoid disturbing load-bearing support posts, hidden electrical wiring, or active plumbing lines. Waste materials are continuously moved into dumpsters to keep the job site clear and safe.
Following the clearance of demolition debris, structural framing carpenters step in to modify the layout. Framing serves as the structural skeleton for all future interior improvements. If new wall studs are out of plumb or floor joists are unlevel, every subsequent layer will suffer. Doors will stick, wall cabinets will hang crooked, and tile work will appear misaligned. Carpenters install structural headers over expanded wall openings, frame new partition walls, and reinforce floor joists to support heavy modern appliances.
During this structural phase, carpenters also install solid wood blocking within wall cavities. Blocking involves fastening wooden blocks between wall studs where heavy items will eventually be mounted. This includes adding reinforcement for kitchen upper cabinets, wall-mounted vanity units, heavy bathroom mirrors, and floating shelves. Ensuring all framing is square and plumb creates a solid foundation for the mechanical installations that follow.
Phase 4: Mechanical, Electrical, and Plumbing Rough-In
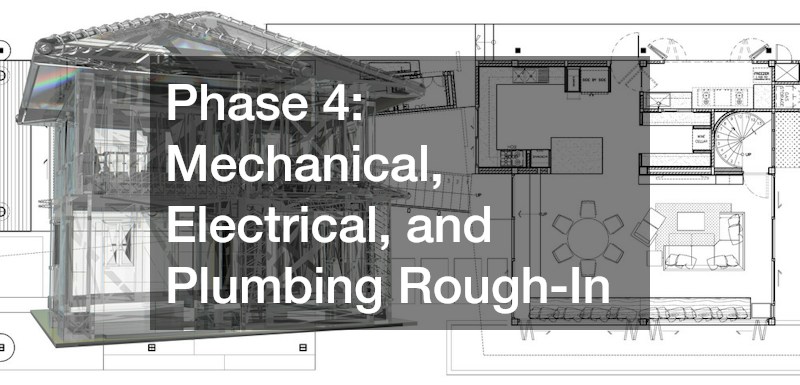
With the structural framework modified and wall cavities fully accessible, the home is ready for mechanical rough-in work. Hidden operational systems are routed throughout the structure. The standard order of operations during mechanical rough-in starts with supply and drainage piping, proceeds to heating and cooling ductwork, and finishes with electrical wiring. This order is practical: large, rigid pipes and metal ducts require the most space inside wall cavities and floor joists, while electrical cables easily bend around established obstacles.
A licensed plumber arrives first to position main drain stacks, vent pipes, and fresh water supply lines. They set shower pans, position waste drains for sinks and toilets, and run lines for appliances. Coordinating pipe routes through wooden joists demands careful planning to maintain structural integrity while ensuring proper slope for drainage.
Next, mechanical technicians install ductwork, air returns, and exhaust ventilation paths. Finally, an electrician strings flexible power lines throughout the framed spaces. They mount junction boxes, run dedicated circuits for heavy appliances, route low-voltage lines for smart home technology, and prepare the main panel for increased power loads. Before wall cavities can be closed with drywall, local building inspectors must perform rough-in inspections to verify safety compliance.
Phase 5: Insulation, Drywall Installation, and Waterproof Wet Room Preparation
Once building inspectors approve the rough-in mechanical systems, wall cavities are packed with insulation to optimize energy efficiency and muffle sound transmission between rooms. Drywall installation begins immediately afterward. Hanging, taping, mudding, and sanding drywall takes several days because each application of joint compound must dry entirely before receiving the next coat. The final sanding pass creates a seamless surface across all walls and ceilings.
With the dry space enclosed, focus moves directly to specialized moisture-prone zones. Bathrooms and laundry areas demand care to prevent water damage. Engaging an experienced bathroom remodeling company at this precise stage ensures that waterproofing membranes and backer boards are installed impeccably. These specialists apply liquid waterproofing barriers across shower enclosures, install sloped mortar beds, and lay durable tile assemblies.
Scheduling wet room tile work before general floor installation is essential because mixing mortar and cutting tile produces fine dust and wet slurry. Containing this messy process prevents damage to finished materials in surrounding rooms. Once wall tiles are grouted and sealed, heavy sanitary fixtures such as toilets, soaking tubs, and vanity bases can be maneuvered into place and connected to pre-established plumbing connections.
Phase 6: Finish Carpentry, Custom Cabinetry, and Countertop Fitting

As wet room tiling wraps up, finish carpenters arrive to install architectural details that give the home character. Interior door frames, window casings, baseboards, and decorative wall paneling are fitted with precision. High-quality trim work conceals expansion gaps and creates clean lines between walls, floors, and ceilings.
Concurrently, custom kitchen and bathroom cabinetry is delivered to the site. Cabinet installation requires precision; box units must be plumbed, leveled, and securely anchored into wall blocking installed during the framing phase. If cabinets are mounted unevenly, doors will drift open, drawers will bind, and heavy solid surfaces will not sit flat.
After cabinet bases are locked in position, digital template technicians measure the exact dimensions of the cabinet layout. Shortly thereafter, the team returns to perform the custom countertop installation. Fabricators maneuver heavy slabs of granite, quartz, or marble into the home, setting them flush onto cabinet structures and securing undermount sinks. Completing heavy stone installation at this stage prevents heavy materials from being dragged across finished flooring later, protecting your investment from accidental damage.
Phase 7: Precision Flooring Installation and Final Wall Painting
With heavy stone surfaces set and finish carpentry completed, the space is ready for main flooring installation. Finished flooring should never be installed too early in the construction process, as heavy boot traffic and falling tools can gouge delicate surfaces. Installers lay down hardwood planks, luxury vinyl tiles, or natural stone, carefully fitting materials around cabinet bases and trimming around doorway jambs. Shoe molding is then applied along baseboards to cover perimeter expansion gaps.
Once finished floors are laid down and carefully covered with protective paper, the space is ready for professional paint services. Professional painters spend time masking off cabinetry, wrapping countertops in protective plastic, and covering new floors with heavy drop cloths.
Applying finish coats near the end of the project efficiently covers up minor scuffs and pencil marks left behind by previous trades. Painters apply durable, washable sheens to walls and smooth enamels to trim and doors. Fresh paint transforms the entire interior, unifying design elements and signaling that heavy construction work is coming to an end.
Phase 8: Final Mechanical Trim-Out and Deep Restoration Cleaning

The final operational stage of the renovation sequence involves bringing specialized mechanical trades back to the site for final trim-out. Electrical crews return to mount decorative switch plates, install light fixtures, wire ceiling fans, and test electrical outlets. Simultaneously, plumbing technicians connect sink faucets, install shower heads, connect dishwasher lines, and test supply and drainage connections under full water pressure to verify there are zero leaks.
At this juncture, physical construction work is complete, but the home remains coated in a layer of fine construction dust. Drywall sanding particles and wood dust inevitably settle into air vents, window tracks, and soft surfaces throughout the property. A standard domestic cleaning is insufficient to resolve post-construction debris.
Hiring a professional carpet cleaning service serves as the ultimate concluding step in the restoration process. Specialized technicians use high-powered extraction equipment to pull deeply embedded construction dust, wood particles, and debris out of carpet fibers and area rugs. Deep cleaning soft surfaces purges indoor air pollutants, restores fabric textures, and leaves the entire home smelling fresh, clean, and safe for occupancy.
The Long-Term Value of Structured Project Scheduling
Executing a major property transformation is a rewarding investment that enhances personal comfort and long-term property value. However, the path to a successful outcome requires strict discipline, methodical planning, and respect for construction sequencing. Attempting to shortcut the schedule by overlapping incompatible trades – such as having painters work alongside drywall sanders – inevitably leads to ruined finishes, wasted materials, and mounting frustration.
By systematically protecting the exterior envelope first, completing rough structural and mechanical systems second, and reserving delicate interior finishes for the final stages, project managers create a harmonious environment where trade specialists can perform their best work.
Ultimately, a well-managed renovation project is defined not by how fast it is rushed to completion, but by how thoughtfully each step is executed. Understanding and enforcing this master trade sequence guarantees that your investment is protected, your timeline remains predictable, and your finished home stands as a masterpiece of craft and design.
