

Building a dream home is one of the biggest financial and emotional investments you will ever make, and the decisions you make before construction even begins often determine whether the process feels exciting or overwhelming. Many homeowners focus on paint colors and countertops, only to discover later that the real challenges lie underground, in the walls, and in the systems nobody sees once the drywall goes up. This guide walks through the critical choices that shape a successful build, from site preparation to interior finishes, so you can move forward with confidence and avoid costly surprises. Taking time to plan these details now will save you money, stress, and regret down the road.
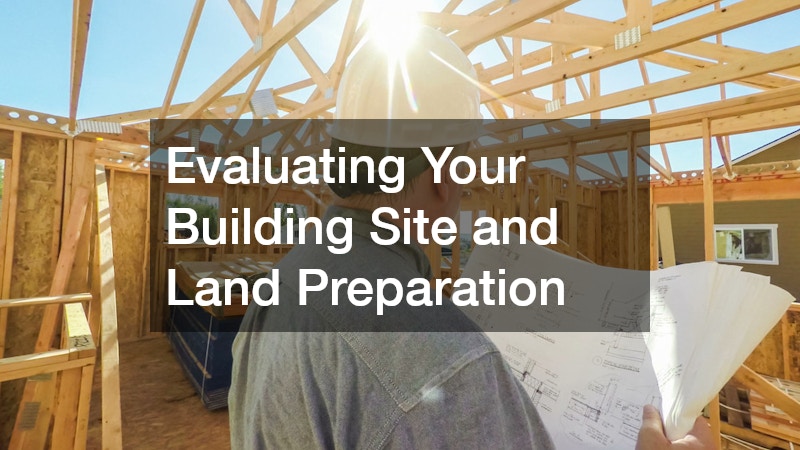
Evaluating Your Building Site and Land Preparation
Before anyone pours a foundation, the land itself needs a thorough evaluation. Soil composition, drainage patterns, and slope all affect how your home will settle over time and whether water will pool near your foundation. A poor site assessment early on can lead to structural issues years later that are far more expensive to fix than to prevent.
Start with a geotechnical soil test, which typically costs a few hundred to a couple thousand dollars but reveals whether you’re building on stable clay, sandy soil, or expansive soil prone to shifting with moisture changes. Expansive clay, for example, can swell and contract enough to crack foundations if it isn’t accounted for in the design. This report also tells your engineer what type of foundation—slab, crawl space, or full basement—will actually work on your lot.
Grading and drainage deserve equal attention. Most codes recommend at least a 5% slope away from the house for the first 10 feet to keep water moving away from the foundation rather than pooling against it. Low spots, nearby streams, or a high water table can all signal future basement flooding or erosion problems if left unaddressed.
Finally, consider the site’s topography and access. Steep slopes may require retaining walls or extensive excavation, both of which add significant cost, while tree removal, boulders, or buried utilities can complicate clearing work. Walking the lot with a builder or civil engineer before finalizing plans often uncovers these issues while they’re still cheap to solve.
Proper dirt work is often the unsung hero of a successful build, involving grading, compacting, and leveling the land so the foundation sits on stable, well-draining ground. This typically starts with a soil test to determine load-bearing capacity and drainage characteristics, since sandy, clay-heavy, or rocky soils each require different preparation strategies. Contractors then strip topsoil, cut and fill low or high spots, and compact the ground in layers—often to a density of 95% or higher—to prevent future settling.
Skipping or rushing this stage is one of the most common mistakes new homeowners make when trying to save money upfront. A poorly graded lot can lead to water pooling near the foundation, uneven settling, cracked slabs, or drainage problems that surface months or even years after move-in. Fixing these issues after construction is far more expensive than addressing them during initial site prep.
Investing in professional excavation and grading services ensures your lot is truly ready before framing begins. Experienced excavators know how to establish proper slope—generally a 5% grade away from the house for the first ten feet—to direct water away from the structure. They can also identify hidden site challenges, such as buried debris, high water tables, or unstable fill soil, before they become costly surprises during construction.
- Have a soil test done to check load-bearing capacity, drainage, and composition (clay, sand, or loam each affect foundation design differently)
- Confirm the lot is graded with at least a 5% slope away from the future foundation for the first 10 feet to prevent water pooling
- Ask about erosion control measures during excavation, such as silt fencing, sediment basins, or temporary seeding
- Verify utility lines and easements before any digging starts, including calling 811 (or your local utility locate service) at least a few days in advance
- Check for existing setbacks and right-of-way restrictions that could limit where the structure can sit on the lot
- Review flood zone maps and local records for any history of standing water or drainage complaints on the property
Assembling the Right Team for Your Project
The people you hire will shape every aspect of your home, from design accuracy to construction quality and timeline reliability. Researching and vetting your team before signing any contracts is one of the most important steps in the entire process. Reputable custom home builders bring not only construction expertise but also established relationships with subcontractors, suppliers, and local permitting offices that can streamline your project.
When comparing builders, look beyond price quotes and examine their portfolio, references, and communication style. A builder who listens carefully to your vision and explains tradeoffs honestly is more valuable than one who simply agrees to everything. Take time to visit completed homes and speak with past clients about their experience.
- Request at least three references from recent projects
- Confirm licensing, insurance, and bonding status
- Ask how change orders and delays are typically handled
- Clarify who oversees day-to-day site supervision
Planning Your Home’s Core Systems Early
Plumbing and HVAC decisions are easy to overlook during the design phase, but they have a massive impact on comfort, efficiency, and long-term maintenance costs. These systems are largely hidden once construction wraps up, so mistakes made now can mean tearing into finished walls later. It’s far cheaper to correct a pipe run or duct path on paper than after drywall goes up.
Working with a knowledgeable local plumber during the blueprint stage helps ensure pipe layouts are efficient and accessible for future repairs. A good plumber can advise on stacking bathrooms and kitchens above one another to shorten pipe runs, choosing PEX over copper for flexibility and cost savings, and placing shutoff valves where they’ll actually be useful during emergencies. They can also flag spots where water heater placement or tankless system sizing will affect flow rate to distant fixtures.
Poor planning here can mean higher water bills, uneven pressure, or costly rework once walls are finished. On the HVAC side, oversized or undersized units waste energy and struggle to maintain even temperatures, so proper load calculations (Manual J, not rough guesswork) matter more than picking a brand name. Deciding on ductwork routing, zoning for multi-story homes, and where returns and vents will sit should happen alongside framing decisions, not after. Getting these details locked in early keeps your systems quieter, more efficient, and far easier to service down the road.
Similarly, choosing the right heating and cooling setup should happen well before framing is complete. Consulting with experienced HVAC companies early allows you to size equipment correctly for your home’s square footage and climate zone, rather than settling for a generic system that struggles to keep up. A proper Manual J load calculation, which factors in insulation levels, window placement, and local temperature extremes, ensures your unit isn’t over- or undersized—both of which waste energy and money.
This is also the time to discuss zoning systems if your home has multiple stories or widely varying sun exposure, since separate thermostats for different areas can prevent constant temperature battles later. Properly planned ductwork and system placement also improve energy efficiency for years to come, and running the numbers on higher-SEER equipment now can pay off through lower utility bills over the life of the system. Deciding on vents, returns, and equipment location before walls go up avoids costly rerouting or exposed ductwork down the road.
- Discuss pipe material options (PEX, copper, or CPVC) and weigh upfront cost against expected lifespan, freeze resistance, and repair ease
- Ask about tankless versus traditional water heater setups, including install cost, energy savings over time, and whether household size justifies the switch
- Request a load calculation (Manual J) for HVAC sizing rather than a rough estimate, since oversized systems waste energy and undersized ones struggle in extreme weather
- Consider zoned heating and cooling for larger homes, especially multi-story layouts or homes with widely varying sun exposure
- Ask whether smart thermostats or zone dampers can be integrated during rough-in to avoid costly retrofits later
- Discuss electrical panel capacity upfront if you plan for future additions like EV chargers, hot tubs, or workshop equipment
Setting a Realistic Budget and Timeline
Every dream home project needs a budget that accounts for both expected costs and the inevitable surprises that arise during construction. Experienced homeowners typically set aside ten to fifteen percent of their total budget as a contingency fund. This buffer helps absorb price fluctuations in materials, labor shortages, or unexpected site conditions without derailing the entire project.
Timelines matter just as much as money, since delays can affect financing, temporary housing costs, and your overall stress level. Ask your building team for a realistic schedule broken into phases, including site work, framing, mechanical rough-ins, and finishing work. Building in flexibility for weather delays or supply chain issues will keep expectations grounded in reality.
- Break your budget into site prep, structure, systems, and finishes
- Get multiple quotes before finalizing major material choices
- Ask for a written timeline with milestone dates
- Build in a contingency fund for unexpected costs
Choosing Flooring and Interior Finishes That Last
Interior finishes are where personality meets practicality, and flooring is one of the most impactful choices you will make. Many homeowners gravitate toward hardwood flooring for its timeless look, durability, and the way it can be refinished multiple times over decades rather than replaced. It also tends to hold resale value better than many other flooring options, making it a smart long-term investment.
That said, hardwood is not the right fit for every room, particularly areas prone to moisture like bathrooms or basements. Consider mixing materials strategically, using more water-resistant options in high-moisture spaces while reserving solid wood for living areas and bedrooms. Think about foot traffic patterns, maintenance routines, and your household’s lifestyle before finalizing these choices.
- Compare solid hardwood versus engineered wood for your climate
- Ask about finish durability ratings for high-traffic areas
- Consider underlayment options for noise reduction and comfort
- Match flooring choices to each room’s humidity and usage level

Designing Outdoor Living and Landscaping Features
Your outdoor spaces deserve just as much planning as the interior, especially if you envision entertaining guests or relaxing after a long day. If a swimming pool is part of your vision, bringing in a custom pool installer early in the design process allows for better integration with drainage, patio layout, and landscaping. Retrofitting a pool after the yard is finished often costs significantly more and can disrupt established landscaping.
Beyond hardscaping, thoughtful landscaping choices protect your investment and reduce long-term maintenance. Applying a fresh layer of mulch around trees, garden beds, and foundation plantings helps retain moisture, suppress weeds, and regulate soil temperature throughout the year. Planning irrigation lines and drainage swales during initial construction is far easier than adding them after sod and mulch are already in place.
- Coordinate pool plumbing and electrical during the main construction phase
- Choose native plants that require less water and upkeep
- Plan drainage swales before finalizing landscaping design
- Refresh mulch beds seasonally to protect root systems
Roofing Materials and Long-Term Durability
The roof is one of the most critical components of your home, protecting everything beneath it from the elements. Choosing durable, climate-appropriate materials upfront can significantly reduce the frequency and cost of roof repairs down the line. Metal, architectural shingles, and tile all offer different lifespans, price points, and maintenance requirements worth comparing before construction begins.
It is also worth discussing warranty terms and installation practices with your builder, since improper installation is a leading cause of premature roof failure. Ask about ventilation, flashing details, and underlayment quality, as these often matter more than the visible shingle choice itself. A well-installed roof with proper attic ventilation will last longer and perform better in extreme weather.
- Compare lifespan and cost across shingle, metal, and tile options
- Ask about manufacturer warranties versus installer workmanship warranties
- Confirm proper attic ventilation to prevent moisture buildup
- Schedule periodic inspections to catch minor issues early

Protecting Your Home From Moisture and Water Issues
Water is one of the most persistent threats to any home, capable of causing damage that ranges from cosmetic to structurally serious. Proper grading, gutter placement, and foundation waterproofing during construction are far cheaper than addressing problems after the fact. Homeowners who skip these details sometimes find themselves needing water damage restoration services within just a few years of moving in.
Beyond initial construction, it helps to understand the early warning signs of moisture problems, such as musty odors, peeling paint, or unexplained humidity in certain rooms. Addressing small leaks or condensation issues quickly prevents mold growth and structural decay. Building in proper drainage and moisture barriers from day one is a preventative step that pays for itself many times over.
- Ensure gutters and downspouts direct water at least five feet from the foundation
- Ask about vapor barriers in crawl spaces and basements
- Install sump pumps in areas prone to high water tables
- Monitor humidity levels in enclosed spaces year-round
Weighing New Construction Against Remodeling an Existing Home
Not everyone starts with a blank lot, and some homeowners find themselves deciding between building new or extensively updating an existing property. If you already own a home with good bones in a desirable location, working with a skilled home remodeler might achieve your vision at a lower cost than starting from scratch. This route can also mean a shorter timeline since existing utilities and structure are already in place.
On the other hand, new construction offers the advantage of designing everything to your exact specifications without inheriting outdated layouts or hidden structural issues. Weighing factors like lot availability, neighborhood restrictions, and your long-term plans will help clarify which path makes more financial and practical sense. Both routes can lead to a dream home, but the right choice depends heavily on your specific property and goals.
- Get a structural inspection before committing to a major remodel
- Compare renovation costs against new construction estimates for similar square footage
- Consider how zoning laws might limit additions or expansions
- Factor in resale value differences between remodeled and newly built homes
Building your dream home involves far more than picking finishes and furniture, it requires careful planning across land preparation, systems, materials, and long-term maintenance considerations. By addressing these critical decisions before breaking ground, you position yourself to avoid costly mistakes and enjoy a smoother construction experience overall. Take time to research your options, ask detailed questions of every professional you hire, and prioritize durability alongside aesthetics. With thoughtful preparation, your dream home can become a lasting reality rather than a source of ongoing stress.
