

A renovation that unfolds in the wrong order can cost you thousands in redone work, delayed inspections, and frustrated contractors standing around waiting for someone else to finish. Before you pick a single paint color or countertop sample, you need a game plan that respects how construction actually works, from the studs out. This guide walks through the upgrades that belong at the front of the line and explains why skipping ahead almost always backfires. Get the sequence right, and every dollar you spend later will actually stick.
Start With a Structural and Foundation Assessment
Before any renovation begins, you need a clear picture of your home’s bones. Cracked foundations, sagging beams, or shifting slabs will undermine every finish you install later, so this inspection should happen before demolition day, not after. A structural engineer or qualified contractor can flag issues that are invisible to the untrained eye but will eventually crack tile, jam doors, and warp new flooring.
If you are planning a major addition or gut renovation, this is also the point where custom home builders earn their keep. They coordinate the structural review with the rest of the build plan, ensuring that framing changes, load-bearing walls, and new square footage are accounted for before anyone touches electrical or plumbing. Skipping this step to save money upfront is one of the most expensive mistakes a homeowner can make.
Address Roofing and Exterior Envelope Issues

Your roof and exterior walls are the shield that protects everything you build inside, so they need attention before interior upgrades begin. A leak that seems minor today can quietly rot framing, ruin insulation, and destroy fresh drywall within a single season. This is why experienced roofing contractors should inspect and repair your roof early in the renovation timeline, even if the roof was not part of your original scope of work.
Waiting until after interior work is finished to deal with roofing problems almost guarantees you will pay twice. Water intrusion does not respect your renovation budget or your finished ceilings.
- Check for missing, curling, or damaged shingles before interior demolition starts
- Inspect flashing around chimneys, skylights, and vents for gaps
- Confirm attic ventilation is adequate to prevent moisture buildup
- Repair or replace gutters that are pulling away from the fascia
Handle Plumbing Repairs and Drain Line Upgrades
Plumbing work belongs early in your renovation sequence because pipes often run through walls and under floors that will soon be closed up for good. If your home has slow-moving drains, recurring clogs, or old cast iron lines, now is the time to deal with them, not after your new flooring is down. Professional drain cleaning can reveal blockages or corrosion that would otherwise turn into an emergency mid-project, forcing you to tear out finishes you just installed.
This is also the ideal window to reroute plumbing for a kitchen island, add a bathroom, or upgrade old galvanized pipes. Once walls are closed and floors are finished, every plumbing change becomes dramatically more expensive and disruptive.
Update Electrical Systems Before Closing Walls
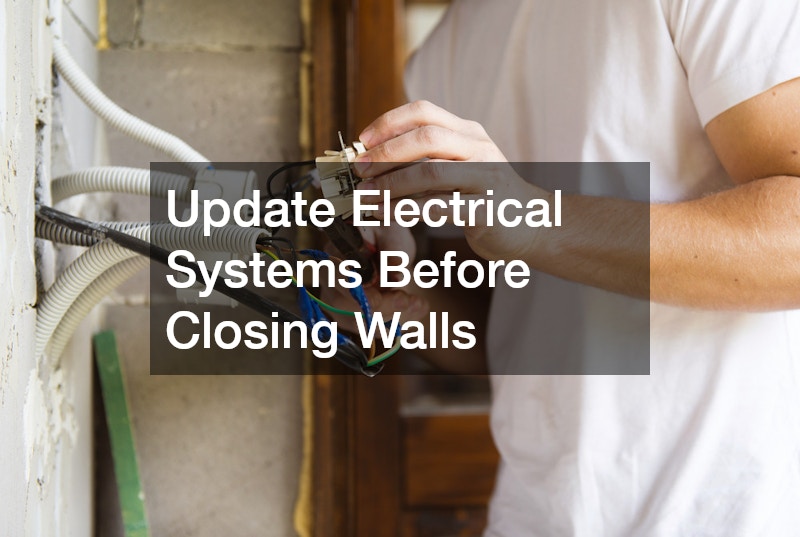
Electrical work should happen in the same early phase as plumbing, while walls and ceilings are still open. Licensed electricians can assess your panel capacity, rewire outdated circuits, and add outlets or lighting locations before insulation and drywall go up. This is especially important if you are adding major appliances, a home office, or an electric vehicle charger, all of which draw significant power and may require a panel upgrade.
Trying to add wiring after walls are finished means cutting into new drywall or fishing cables through tight spaces, which is slower, messier, and often more expensive. Getting your electrical plan settled early also allows for better placement of switches, fixtures, and smart home components.
- Confirm your panel can handle new appliances or additions
- Plan outlet and switch locations before drywall goes up
- Add dedicated circuits for kitchens, laundry rooms, and garages
- Consider future needs like EV charging or a home generator
Plan Heating and Cooling Upgrades Early
HVAC changes need to happen before insulation, drywall, and flooring are finalized, since ductwork often runs through walls, ceilings, and floor cavities. Cutting into finished surfaces later to reroute a supply line or add a return vent almost always means costly rework, so this step belongs at the very front of your sequencing plan. If you are adding square footage or reconfiguring rooms, your existing system may not have the capacity to heat and cool the new layout effectively. A unit sized for 1,800 square feet won’t necessarily keep up once you’ve added a 400-square-foot bump-out or converted an attic into livable space, and undersized equipment leads to uneven temperatures and higher utility bills down the road. Consulting with air conditioning companies during the planning phase ensures your ductwork, vents, and equipment sizing are handled before everything gets sealed up behind finished surfaces. A qualified technician can perform a load calculation to confirm whether your current furnace and condenser can handle the new demands, or whether you need a larger unit or a second zone entirely. This is also the time to think about vent placement relative to your new floor plan, whether ductless mini-splits make more sense for an addition than extending existing trunk lines, and how thermostat and zoning controls will need to shift. Sorting these details out now, while walls are still open, saves you from expensive retrofits once the drywall goes up.
An undersized or poorly placed HVAC system is one of the hardest things to fix after a renovation is complete. Once walls are closed up, floors are finished, and ductwork is buried, correcting a heating and cooling mistake means tearing into work you just paid for. That’s why an HVAC assessment should happen at the same stage as your structural and electrical planning, not as an afterthought once the layout is set. Start by having a contractor run a load calculation (often called a Manual J calculation) rather than guessing based on square footage. Additions, vaulted ceilings, extra windows, or open-concept layouts can all change how much heating and cooling capacity you actually need. A system sized for the old floor plan often leaves new rooms too hot, too cold, or noticeably drafty. Addressing it early also gives you the chance to improve energy efficiency across the whole home, not just the newly renovated section. This is the ideal time to consider upgrades like a higher-SEER unit, added zoning for multi-story homes, or a heat pump replacement, especially if your existing system is more than 12-15 years old. It’s also far cheaper to reroute ductwork or add supply vents while walls and ceilings are still open than to retrofit them later.
Finish Flooring Foundations and Garage Surfaces

Once plumbing, electrical, and HVAC rough-in work is complete, attention can shift to floors and other surfaces that depend on a stable subfloor. Garages and basements often get overlooked in this phase, but they are worth addressing now while other trades are already on site. Concrete floor coatings applied at this stage can seal, protect, and brighten a garage or workshop floor, extending its life and making cleanup far easier down the road.
Applying these coatings later, after cabinetry or shelving has been installed, is far more difficult and often leads to uneven results. Doing this work while the space is still open gives the coating time to cure properly without foot traffic or equipment interference.
Sequence Kitchen and Bathroom Finish Work
Kitchens and bathrooms are where most renovation budgets concentrate, and getting the order right here matters as much as it does for the rest of the house. Cabinetry should be installed before countertops are templated, since countertop fabricators need exact cabinet placement to cut an accurate fit. Rushing this step or trying to install countertops before cabinets are fully secured almost always results in gaps, uneven seams, or a poor fit against appliances.
Plumbing fixtures, backsplash tile, and lighting typically follow countertop installation, in that order. This sequence protects your finished surfaces from scratches, spills, and impact damage during the messier stages of construction.
- Install and level cabinets before measuring for countertops
- Schedule countertop templating only after cabinets are fully secured
- Wait to install sinks and faucets until countertops are in place
- Add backsplash tile after countertops to ensure a clean, tight seam
Complete Exterior Living Spaces After Core Systems

Outdoor upgrades like decks, patios, and porches should generally wait until your home’s core systems and interior work are stable, especially if they connect to the main structure or require new electrical and plumbing runs. Tying a new deck ledger board into the house, for instance, requires confidence in the condition of your rim joist and sheathing, which you don’t want to discover is rotten after the decking is already installed. Similarly, running gas lines for an outdoor kitchen or grill is far cheaper to coordinate while your plumber is already on-site for interior work than as a standalone service call later. A screened porch is a good example of how many trades this kind of project actually touches. It often needs its own roofline tie-in, electrical outlets for lighting and fans, sometimes a ceiling fan circuit, and occasionally HVAC extension if you want it conditioned — all of which are easier to coordinate once your main renovation trades have already been scheduled and completed. Sequencing this after your interior electrical panel upgrade also means you’ll have the spare capacity to add these circuits without a second panel evaluation. Building outdoor living space too early can also mean protecting it from dust, debris, and heavy equipment traffic during the rest of the renovation. A newly stained deck or freshly poured patio can be scratched, stained, or cracked by ladders, scaffolding, and material deliveries meant for interior work. Waiting until major deliveries and demolition are finished protects your investment and avoids the cost of touch-up repairs, refinishing, or replacing damaged materials before you’ve even had a chance to enjoy the space.
That said, exterior structural work like garage door tracks or overhead door repair should happen earlier if the garage is part of your active work zone, since large equipment and materials often need to move through it. Dumpsters, lumber deliveries, and contractor vehicles put real stress on driveways and door openings, and a door that’s already compromised won’t hold up to that traffic. Think through the sequence carefully: if framing crews, drywall teams, or flooring installers need garage access for staging materials, schedule any overhead door repair or track alignment before that traffic picks up, not after. A newly repaired spring assembly or realigned track can be knocked out of adjustment by a single mishap with a forklift or a stack of plywood scraping the frame. Coordinating this timing prevents damage to newly repaired doors and openers from ongoing construction traffic. It also saves you from paying for the same repair twice — once before the heavy work begins and again after it wraps up, simply because nobody accounted for months of daily wear during active construction.
Save Landscaping and Yard Work for Last
Landscaping should almost always be the final phase of any renovation, after heavy equipment, dumpsters, and delivery trucks are done using your driveway and yard. Grading, sod, irrigation lines, and plantings are easily damaged by construction traffic, so installing them early is often a wasted investment. A landscaping company can also use this final stage to address any drainage issues that surfaced during construction, directing water away from your new foundation work or exterior additions.
This is also the point where you can finally address curb appeal changes like walkways, retaining walls, and outdoor lighting without worrying about them being torn up again. Saving this step for last protects your investment and gives you a clean, finished look to complete the project.
Sequencing a renovation correctly is less about following rigid rules and more about respecting how each system depends on the ones before it. Structural work, roofing, plumbing, electrical, and HVAC need to happen first, followed by finishes, and only then exterior and landscaping work. Taking the time to plan this order with your contractors before demolition begins will save you money, prevent redone work, and keep your project moving forward without costly surprises. Talk to your project team about the full sequence before signing off on a start date, so every trade knows exactly when their work fits into the bigger picture.
