- Review and understand your one-year home warranty’s inclusions, exclusions, and claim procedures before move-in.
- Conduct thorough inspections at key stages—pre-closing, 30 days after move-in, mid-year, and 10 months before warranty expiration.
- Keep a detailed record of defects, repair requests, photos, and all correspondence with your builder.
- Report issues as soon as they appear; delaying claims can lead to coverage denial.
- Stay proactive with quarterly and seasonal home maintenance to prevent small issues from becoming major repairs.
- Work with new home construction specialists that include a one-year warranty on both labor and materials for added confidence and long-term protection.
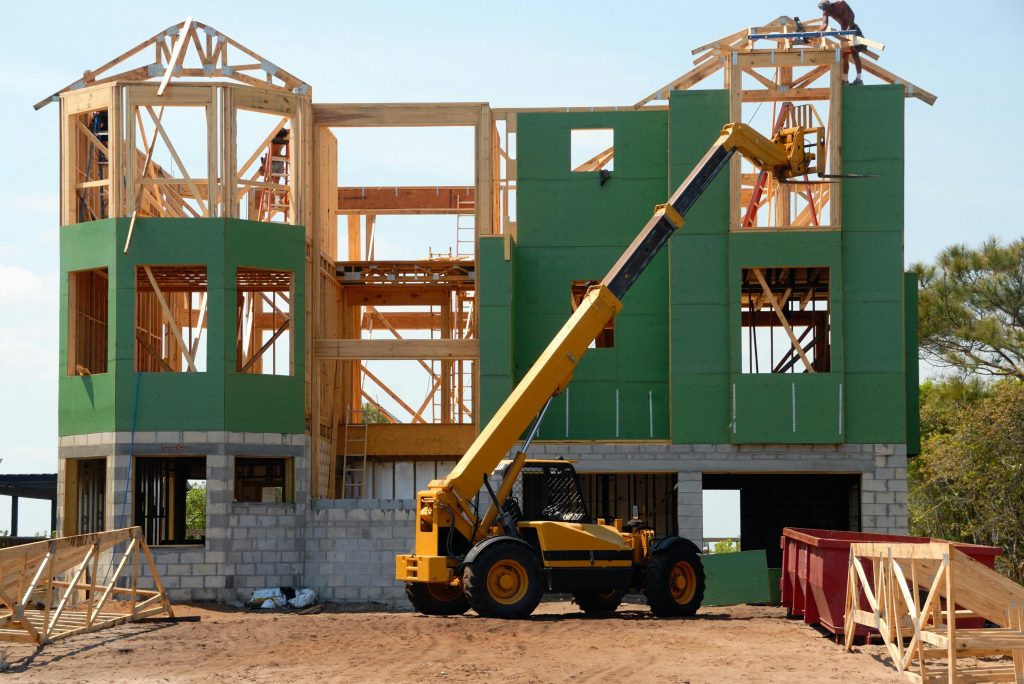
When you move into your newly built home, you expect everything to work flawlessly—the doors to shut smoothly, the plumbing to run perfectly, and the paint to look pristine. However, even in high-quality builds, minor issues can surface after a few months of occupancy. That’s where your one-year home construction warranty becomes invaluable. For homeowners who’ve chosen new home construction that includes a one-year warranty on both labor and materials, this coverage provides peace of mind and ensures that any construction defects are addressed at no extra cost.
The key is to understand your warranty, track potential issues, and stay proactive throughout the first year. This comprehensive guide walks you through how to maximize your warranty coverage, from move-in day to the 12-month inspection, so you can protect your investment and enjoy a worry-free living experience.
Understanding the Purpose and Scope of Your One-Year Warranty

A one-year warranty in new home construction is designed to protect homeowners from defects related to workmanship and materials. Essentially, it’s your builder’s assurance that your home was built to agreed standards and that they’ll repair or replace any part that fails due to poor workmanship or defective materials.
What’s Typically Covered
Your one-year home construction warranty generally includes:
- Structural elements: Walls, framing, foundations, and support beams that experience cracks, uneven settling, or material failure.
- Workmanship and finishes: Issues with drywall, flooring, trim work, painting, cabinetry, or tile that stem from installation errors.
- Mechanical systems: Electrical wiring, plumbing, and HVAC components that were installed by the builder and fail prematurely.
- Fixtures and fittings: Installed sinks, faucets, and lighting fixtures that develop defects not caused by normal wear and tear.
What’s Commonly Excluded
Equally important is understanding what the warranty doesn’t cover. Homeowners are typically responsible for:
- Damage caused by neglect, accidents, or misuse.
- Natural disasters such as flooding, earthquakes, or heavy storms.
- Normal wear and tear (such as minor fading, scratches, or settling).
- Maintenance tasks like cleaning gutters, caulking windows, or resealing driveways.
By knowing what’s included and excluded, you can focus your attention on areas where the warranty provides protection and avoid disputes later.
Before Move-In: Setting the Foundation for Warranty Success
The process of maximizing your warranty begins before you even move into your new home. Taking a few careful steps during this stage can save you time and frustration later.
Conduct a Pre-Closing Walkthrough
Before you accept the keys, schedule a thorough walkthrough with your builder or inspector. This allows you to identify visible issues before you officially take possession.
During your walkthrough:
- Check walls, ceilings, and floors for cracks, gaps, or uneven surfaces.
- Open and close all doors and windows to ensure proper alignment.
- Test outlets, switches, and light fixtures for functionality.
- Run all faucets, showers, and toilets to check for leaks or drainage issues.
- Examine paint, trim, and finishes for uneven application or damage.
Document everything with photos and written notes, and ensure that your builder agrees in writing to address any deficiencies.
Organize Important Documentation
Create a dedicated folder or digital archive for all construction-related documents. This should include:
- Blueprints and final floor plans.
- Contractor and subcontractor contact lists.
- Appliance manuals and manufacturer warranties.
- Receipts for materials and installations.
- Your official warranty agreement.
Having these records on hand makes it much easier to reference specific materials or installation details when you file a warranty claim.
The First 30 Days: Inspect, Document, and Report
Once you’ve moved in, your first month of occupancy is critical. Many issues—especially minor ones—become noticeable only after you’ve lived in the home for a few weeks.
Conduct an Independent Home Inspection
Even if your builder conducted inspections during construction, hiring an independent home inspector shortly after move-in offers a second layer of protection. A professional can identify hidden defects or potential problems before they escalate.
Create a Home Maintenance and Issue Log
Keep a record of every issue you observe, even small ones. Include:
- The date the problem was discovered.
- A detailed description of the issue.
- Photographs or video evidence.
- Correspondence with your builder or warranty representative.
This log serves as proof of your diligence and can help resolve disputes efficiently.
Submit Warranty Claims Promptly
Don’t wait until the end of the year to report problems. The sooner you submit a claim, the easier it is for the builder to address it. Provide clear details, photos, and references to your warranty documentation. Builders are more likely to act quickly when claims are well-documented and professionally presented.
Quarterly and Seasonal Checkpoints
Homes naturally settle and adjust to environmental conditions during the first year. Regular inspections throughout each season will help you stay on top of changes and detect issues early.
Spring Maintenance
- Inspect gutters and downspouts for blockages or leaks.
- Examine your roof for missing shingles or flashing problems.
- Check for cracks in the foundation caused by winter frost.
- Inspect exterior paint and siding for peeling or warping.
Summer Maintenance
- Test air conditioning systems for cooling efficiency.
- Inspect window seals and screens.
- Check decks, patios, and outdoor structures for movement or rot.
- Monitor water pressure and outdoor plumbing connections.
Fall Maintenance
- Test your heating system and clean vents.
- Inspect attic insulation and weather stripping.
- Clear leaves from gutters and yard drains.
- Ensure exterior caulking remains intact.
Winter Maintenance
- Monitor for condensation or drafts around windows.
- Check that plumbing pipes are insulated.
- Keep a close eye on humidity levels to prevent mold or cracking.
Staying consistent with seasonal maintenance not only keeps your home in good shape but also demonstrates to your builder that you’ve upheld your homeowner responsibilities—critical when warranty claims are evaluated.
The Six-Month Review: Mid-Warranty Evaluation
At the halfway mark of your warranty, schedule a more thorough evaluation of your property.
Perform a Whole-Home Walkthrough
Revisit every room and feature in your home. Look for changes since your move-in inspection:
- Uneven floors or new cracks in walls.
- Shifting doors or misaligned frames.
- Persistent plumbing or HVAC issues.
- Discoloration or bubbling in paint or tiles.
Compare your findings with earlier records to identify recurring problems.
Request Repairs and Follow Up
If any previously reported issues remain unresolved, contact your builder in writing. Provide references to earlier correspondence and set clear timelines for resolution. Builders are typically obligated to respond within specific timeframes under your one-year warranty.
The Ten-Month Check: Preparing for Warranty Expiration
With just two months left before your warranty expires, this is your final opportunity to identify and address problems that may still fall under coverage.
Hire a Professional Home Inspector
A professional inspection at this stage can be the best investment you make. Inspectors are trained to detect subtle or hidden defects that homeowners might overlook, such as foundation settlement or early signs of water damage.
Prepare a Comprehensive Warranty Claim List
Gather all unresolved or newly discovered issues and compile them into one formal submission. Include:
- Detailed descriptions of each defect.
- Supporting photos and previous correspondence.
- Dates of discovery and any prior repair attempts.
Submit this list at least 30 days before your warranty expires to ensure there’s enough time for repairs to be scheduled and completed.
Verify Repair Completion
Once your builder addresses these issues, inspect the repaired areas carefully. Request written confirmation that all work was completed according to quality standards and keep this record for your files.
Beyond the First Year: Long-Term Home Maintenance

When your warranty period ends, ongoing maintenance becomes your responsibility. The good news is that the habits you developed during the first year—inspection, documentation, and communication—will serve you well for years to come.
Transition to a Maintenance Routine
Continue quarterly and seasonal inspections, and schedule professional maintenance for major systems like HVAC and plumbing. Keep receipts and reports, as they’ll be useful for resale or extended warranty considerations.
Consider Extended Coverage
If your builder or a third-party provider offers extended warranty options, evaluate whether they’re worth the investment. Focus on coverage for high-cost systems such as HVAC, roofing, and major appliances. Compare pricing and service response times before committing.
Learn from the Warranty Experience
Use your first year as a learning experience. Understanding your home’s systems and materials will make you a more confident and proactive homeowner. Keep all warranty documentation even after expiration—it can provide valuable context for future repairs or improvements.
Common Mistakes Homeowners Make with Warranty Coverage
Even the best warranties can be undermined by simple mistakes. Avoid these pitfalls to ensure you get the most from your coverage:
- Failing to read the warranty thoroughly: Many homeowners assume all defects are covered. Always review your warranty’s terms, conditions, and exclusions.
- Delaying issue reports: Waiting too long to report a defect can result in denial of coverage. Report issues promptly and keep communication records.
- Lack of documentation: Without photos, inspection notes, and emails, proving your claim can become difficult. Maintain a detailed log.
- Ignoring small issues: Minor cracks or leaks can worsen over time. Address them early before they turn into major repairs.
- Not following up: Don’t assume that submitting a claim guarantees a fix. Follow up until the repair is complete and properly documented.
By avoiding these common errors, you’ll ensure your home receives the care and quality it deserves under warranty.
Working with Reliable Builders and Construction Specialists
A builder’s responsiveness and commitment to quality make a big difference in how smoothly your warranty experience goes. Homeowners who choose new home construction that includes a one-year warranty on both labor and materials often benefit from builders who take accountability seriously.
Some specialists even offer fast quote turnaround and next-day site visits for inspections or warranty claims—helping you resolve problems quickly without unnecessary delays. Partnering with such professionals ensures not just quality construction but also peace of mind that your concerns will be addressed promptly and thoroughly.
Conclusion: Stay Proactive, Stay Protected
Your one-year home construction warranty is more than a safety net—it’s a partnership between you and your builder to ensure your home meets lasting quality standards. The first year of homeownership is a learning curve filled with discoveries, adjustments, and occasional repairs.
By following this homeowner’s checklist, keeping meticulous records, and maintaining open communication with your builder, you can maximize every benefit of your warranty. Be proactive, inspect regularly, and don’t hesitate to report issues as soon as they arise.
With careful attention and cooperation, your home will not only maintain its value but also continue to be a source of pride, comfort, and reliability for years to come.